-
Last updated on September 13, 2024
-
If you are using a ISPmanager server, please follow the steps below for the Converter for Media plugin to work properly.
-
Step 1.
Log in to your ISPmanager dashboard and go to the “File manager” tab (using the menu on the left).
-
Step 2.
Go to the
/etcdirectory and then to the/nginxdirectory. -
Step 3.
Edit the following file:
nginx.conf.isp -
Step 4.
Find a line like this (the content may vary depending on your configuration), which contains image formats (jpg, jpeg, png, etc.):
location ~* ^.+\.(jpg|jpeg|gif|png|svg|js|css|mp3|ogg|mpe?g|avi|zip|gz|bz2?|rar|swf)$ {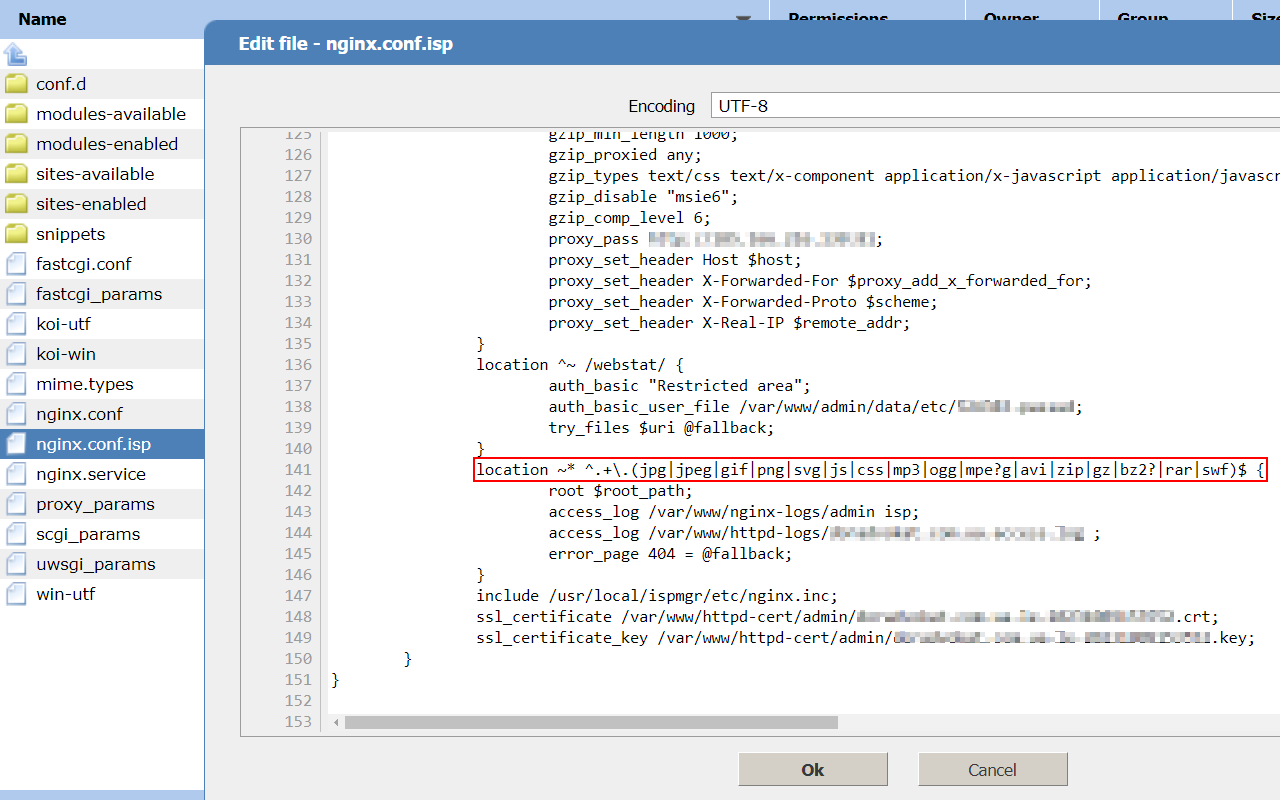
-
Step 5.
Remove the following file formats from this line:
- jpg
- jpeg
- png
- gif
- webp
This is an example of the line before the changes:
location ~* ^.+\.(jpg|jpeg|gif|png|svg|js|css|mp3|ogg|mpe?g|avi|zip|gz|bz2?|rar|swf)$ {This is an example of the line after the changes:
location ~* ^.+\.(svg|js|css|mp3|ogg|mpe?g|avi|zip|gz|bz2?|rar|swf)$ { -
Step 6.
Save the changes to the nginx.conf.isp file.
-
Step 7.
In your ISPmanager dashboard, go to the “Services” tab (available in the Management Tools menu or in the Monitoring menu).
-
Step 8.
Find the Nginx service in the list and select it.
-
Step 9.
Use the Restart button to restart the Nginx service.

-
Step 10.
That’s all! The error on the plugin settings page should disappear.