-
Last updated on May 30, 2025
-
Do you know what a person that hits your site pays attention to in the first place? It’s images, of course! Proper image optimization is at your fingertips, and in this article I will tell you how to optimize images step by step. It is easier than you think!
-
WordPress image optimization – why should I actually do it?
There are numerous reasons why you should optimize images on your website. However, let’s focus on three of them – in my opinion, the most important ones why you should undoubtedly optimize every single image on your site.
Image compression reduces page load time
Some are unaware of how much images can weigh and slow down their sites. Website creators assume straight away that the more images on a page the better.
In spite of not being completely wrong, there are some issues to have in mind when uploading many of them on your website. The real problem arises when these images are non-optimized and slow the page down.
Why is it crucial to have your website’s loading time reduced to the minimum, you might ask? Well, there is one answer that comes to my mind right over: It is easier for shoppers to convert into buyers when they can navigate faster. The faster they can navigate, the happier they are. As easy as that!
Reducing the size of images improves user experience on your website
Visiting a site that is rich in heavy, aggravating and slowing images comes with one basic risk. Namely, there is a high probability that a person on your site will lose patience and bounce looking for a solution on your competitor’s site.
Users prefer websites with a loading speed of less than 2 seconds, so you should always aim not to exceed this loading time. The longer it takes for your website to load, the more likely it is for users to abandon it, which will dramatically increase your bounce rate and eventually affect your conversion rate.
Image optimization helps you to improve your SEO
Your website can be understood better by readers and search engines when you use optimized images. Apart from that, there is a growing trend of visual search as seen with Google’s new search function that combines text and images. It is the most desired technology by the present generation, claiming they want it more than anything else.
Google tends to penalize websites with an extended loading time in its algorithm. Any person involved in online marketing knows how important it is, as it is directly related to the position a site will get in the SERP.
Image optimizer plugin: Converter for Media
Once we’ve explained all this, let’s get down to business! To optimize images on your WordPress website smoothly and efficiently, you will need an image optimizer plugin.
There are several excellent WordPress image conversion plugins available out there. I recommend you to try Converter for Media.
Converter for Media – Optimize images by matt plugins is certainly what you are looking for. This plugin will compress images on your website in the blink of an eye. The only thing you’ll have to do is basically just to download and activate it – the rest will be handled by the plugin. It has more than 500,000 active installs, has been translated into 22 languages, is constantly being updated and has an excellent rating of 4,9 out of 5 stars. The free version of the plugin supports image compression to WebP format. If you are interested in AVIF format, you should use the PRO version.
Start to optimize your images
I will show you the basic steps of using the plugin in the free version:
- First of all, you will have to download and activate the image optimization plugin.
The plugin will appear in the Settings tab on the left side of your Dashboard, right here:
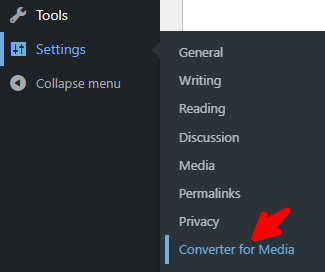
That’s your image optimizer plugin. Click it. A screen with general settings of the plugin will appear.
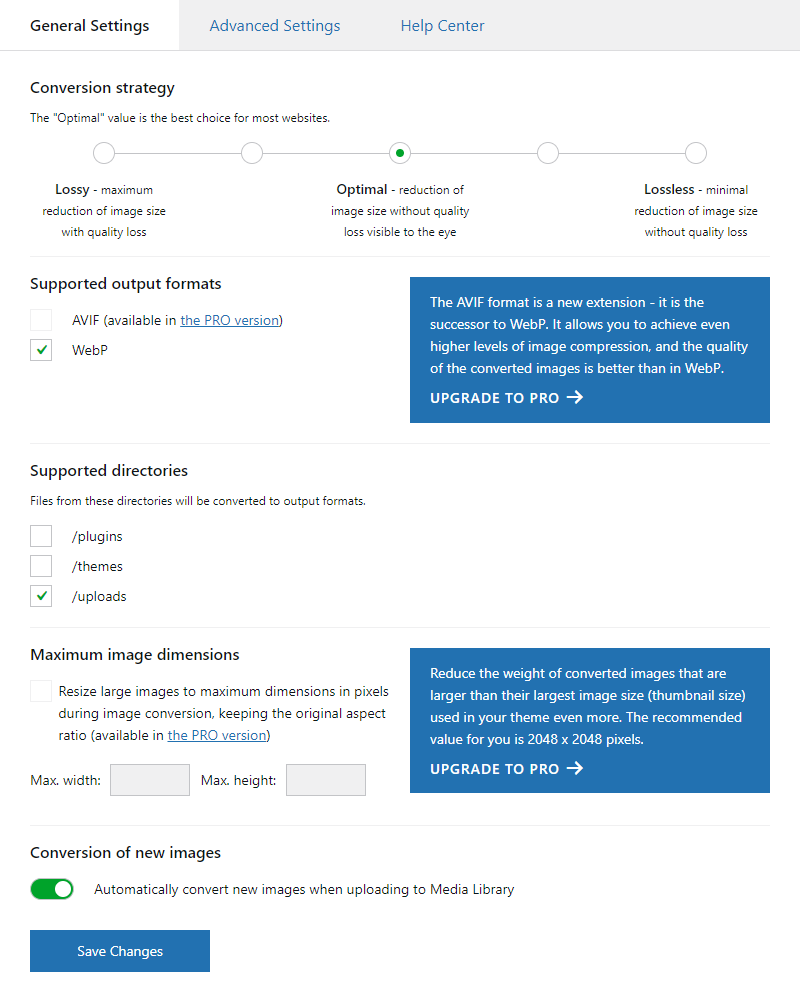
Good news – the plugin has already been configured by default for you, and you can convert all your images with one mouse click! In addition, if you check the option “Automatically convert new images when uploading to the Media Library”, each new image added to the Media Library will be automatically converted, and you will not have to do anything. How cool is that?
Let’s move on to the feature for optimizing multiple images at once, namely Bulk Optimization of Images – you’ll find it at the bottom of the settings page.
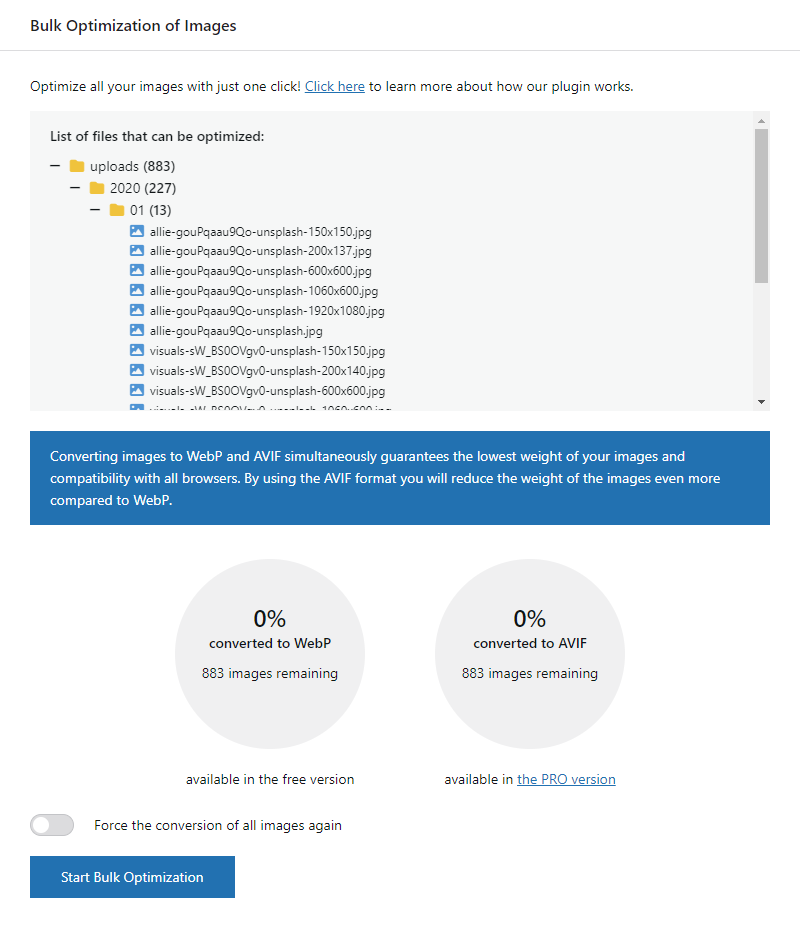
Here you have a list of all the images that are in the Media Library, and those that can be optimized.
Click “Start Bulk Optimization” to convert them all to WebP format. Keep in mind, however, that there is also the AVIF format, which will reduce the weight of the images even more compared to WebP. AVIF format support is only available in the premium version of this image conversion plugin.
That ‘s it! The work is done, with one click of the mouse the plugin optimized, in my case, 883 images to WebP format. By doing so, I know that I am providing my site visitors with website performance at the highest level.
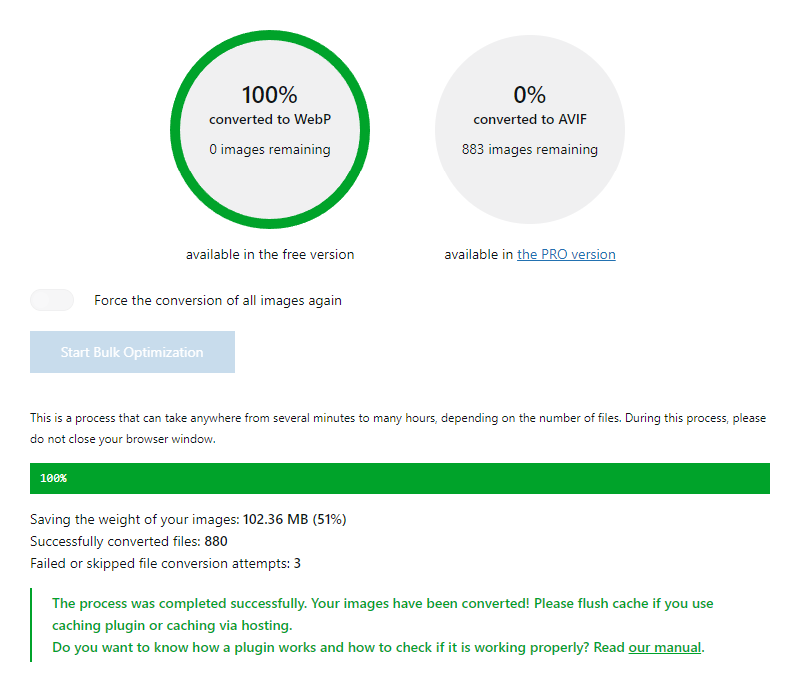
The plugin has finished its work (faster than you expected, right?) and your site’s visitors can enjoy a much faster website. You, on the other hand, can rest assured – now your site is more SEO-friendly, and all the images you upload from now on will load in a flash without losing quality!